
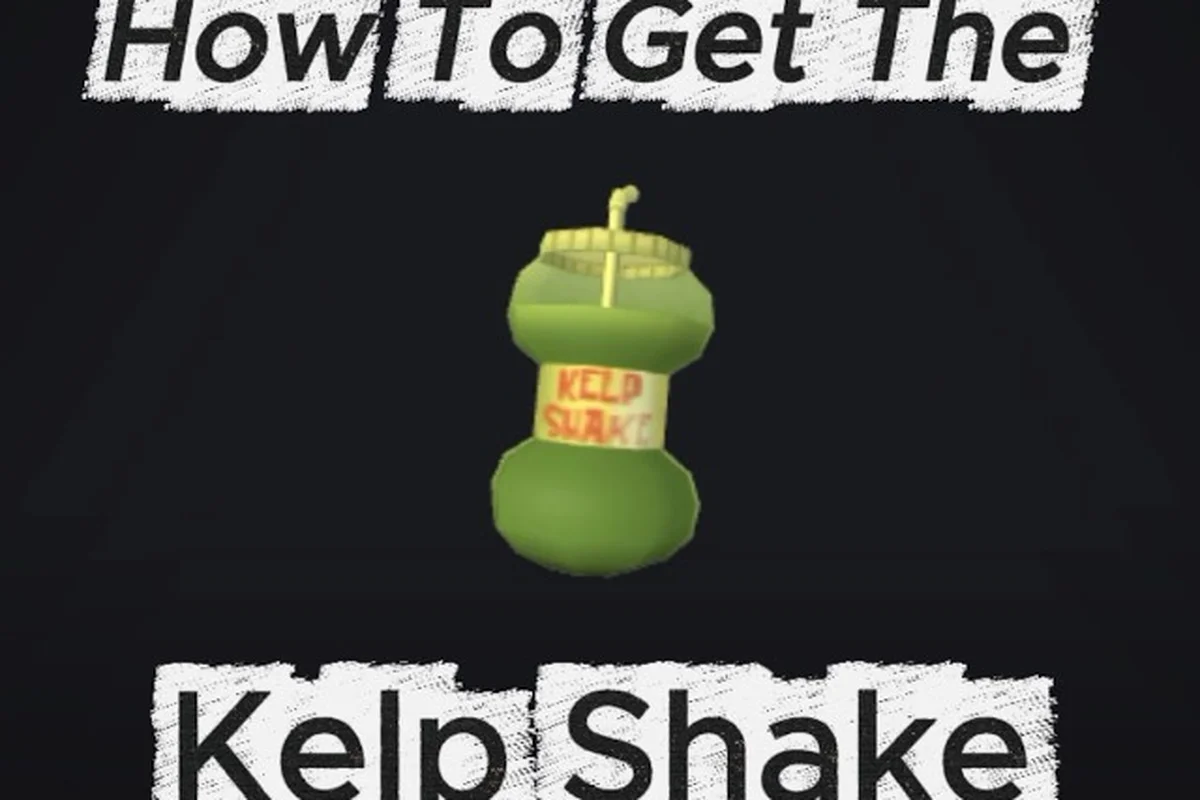
Choosing the right Save the Krusty Krab revive item can turn a failed service into a successful shift, so this guide explains when recovery tools deserve a place in your budget. You will find practical comparisons, purchase priorities, and ways to avoid overpaying for temporary convenience.
Revival is tied to Gary’s magic conch in community class reports, and CHALLS' community guide video covers class choices and doubloon priorities during normal play.
Revive Item Core Mechanics
The Save the Krusty Krab revive item is a safety purchase for tough service runs: its value comes from recovering from a costly mistake rather than producing points continuously. Before buying one, identify the failure that drains your shift, compare that cost with your available cash, and make sure you are not postponing a more fundamental upgrade.
Community field notes describe a useful decision rule: buy capacity before speed when orders stack up, but buy speed before capacity when walking distance is the main problem. These priorities matter because a recovery item can restore your current run, yet it cannot correct a build that fails every order through the same bottleneck.
| Shift problem | Best upgrade direction | Why revival becomes less urgent |
|---|---|---|
| Orders accumulate near stations | Increase capacity | Carrying more stock reduces repeated trips |
| Long walks consume service time | Increase speed | Faster movement shortens each delivery loop |
| Cooking or plating causes frequent errors | Improve workflow tools | Better handling reduces failures at the source |
| A single mistake threatens a good run | Keep a revive item | Recovery protects the progress already earned |
Recovery Versus Permanent Improvement
A revive item is best understood as insurance with an activation limit, whereas a capacity, speed, or workstation upgrade improves the engine that produces income. If you repeatedly lose because customers arrive faster than you can serve them, permanent capacity and flow improvements should usually precede emergency recovery. If a single late mistake can erase most of a shift, the safety net becomes more valuable.
The Failure Cost is the practical measure. Estimate what the mistake costs in lost service, ingredients, patience, or paid rewards. Compare that amount with the recovery purchase price and the number of times you can realistically use the item during a run. An expensive revive item may still be sensible for difficult days, but it is poor economy when basic improvements can prevent most mistakes.
What the Available Data Confirms
The supplied community notes confirm that the night shop appears between shifts and is funded by cash earned during the day, not doubloons. They also report rotating stock, although the exact pool and refresh rules are not documented by the developer. Consequently, you should plan a cash reserve and avoid assuming that a specific recovery option will appear every night.
| Confirmed point | Practical use | Reliability |
|---|---|---|
| Shop purchases use shift cash | Save earnings for night-shop spending | Community report |
| Stock rotates | Keep several upgrade priorities | Community report |
| Exact rotation is undocumented | Do not plan around a guaranteed item | Confirmed data boundary |
| Villains appear within certain day ranges | Delay damage-control purchases until relevant | Community field note |
The broader Save the Krusty Krab night shop guide explains how to prepare for changing offers, while this guide focuses on judging the value of the revive option once it appears. In practice, treat the revive item as emergency insurance rather than a routine upgrade: if a costly shift ends in defeat, restoring the run can preserve cash and progress, but buying it while your current earnings are still secure may leave too little shift cash for essential upgrades. Compare its price with the value of one failed shift, then consider whether the same cash could fund a more reliable damage-control purchase before a dangerous day range.
Best Items to Buy by Bottleneck
The strongest purchase is the one that fixes the most expensive recurring failure. Instead of creating a universal ranking, match the item to the bottleneck you can observe during service. This produces better results than buying whichever upgrade has the highest nominal tier because a high-tier item can remain irrelevant when orders, movement, or handling—not recovery—is limiting performance.
| Priority tier | Item category | Buy when | Skip when |
|---|---|---|---|
| S | Capacity | Orders regularly stack up | Walking time is the main loss |
| S | Movement speed | Travel between stations dominates | You already reach every station comfortably |
| A | Workflow or prep tool | Errors happen during cooking, plating, or setup | Your current process already handles demand |
| A | Revive item | One mistake can erase a strong shift | The purchase ends your normal upgrade budget |
| B | Damage control | Villains are already part of the shift | They do not appear in the current range |
| C | Convenience | It is inexpensive and improves routine handling | It delays a proven capacity or speed need |
This is a practical Save the Krusty Krab upgrade tier list based on bottleneck relevance rather than unsupported exact percentages. Because the developer has not published a complete formula for patience, energy, customer growth, or villain timing, treat community observations as guidance rather than fixed guarantees.
Capacity First When Orders Build Up
Capacity earns its place when you repeatedly notice backlogged orders rather than failed interactions. More room can let you stage several requests, reduce repeat trips, and preserve momentum during a rush. A revive item cannot recover the time lost while ingredients sit scattered around the restaurant or while a customer waits for an item that was never collected.
Buy capacity when the shift log or your own play pattern shows that you leave usable orders behind. Do not buy it merely because the upgrade sounds strong. If your real issue is slow movement between distant work areas, capacity may add another item to carry without addressing the route that causes delays.
Speed First When Distance Drains Time
Movement speed is the stronger choice when you are repeatedly crossing the restaurant with little time spent on mistakes. The community decision rule is practical: buy speed before capacity when walking distance is the bottleneck. This matters because speed improves every trip, while capacity mainly matters when you have enough available orders to justify carrying more at once.
Use travel time to judge whether the Speed revive item belongs in your next upgrade purchase. If a typical trip from the grill to the serving counter consumes several seconds of peak service, movement speed can shorten that route across every order. However, saving cash for Speed makes little sense when cooking, plating, or service-station queues create the real delay; faster movement simply carries you to the bottleneck faster instead of reducing the time lost to mistakes or unfinished tasks.
Revive Last Within One Shift
A revive item is a strong emergency purchase for a difficult shift, but it should not automatically become the foundation of your build. Save the recovery option for a run where the stakes are high and the failure cost is clear. Otherwise, permanent upgrades usually create more value over the same period because they can influence many service cycles.
This distinction also keeps your Save the Krusty Krab cash spending guide practical: buy a normal upgrade only when it improves the early service cycle, then reserve the remaining cash for a revive item if one failed shift would cost more than the upgrade’s current benefit. For example, if a single mistake can end a high-value order streak, treat the revive as insurance; if a missed order mainly reduces a smaller payout, unspent cash may be the better choice.
Upgrade Costs and Cash Planning
Upgrade costs should be treated as a budgeting constraint, not an isolated price tag. The supplied data does not provide a verified table of purchase prices, so avoid inventing exact cash amounts. Instead, compare the price shown in the night shop with the value of the shift you can protect and the number of likely uses available before the next reset.
| Cost signal | Meaning | Budget response |
|---|---|---|
| Price exceeds a normal upgrade | Recovery competes with core growth | Save for another night unless the shift is critical |
| Price is similar to a needed permanent upgrade | Equal opportunity cost | Choose the item that fixes the recurring cause |
| Price leaves a healthy cash reserve | Emergency purchases remain possible | Buy the most relevant offer available |
| Price consumes nearly all earnings | Little room for a bad run | Delay unless a failure would end the shift |
Build a Three-Bucket Cash Plan
Divide your earnings into three mental buckets: Core Growth, Shift Insurance, and Flexible Reserve. Put upgrade money in Core Growth, reserve enough for one appropriate revival purchase in Shift Insurance, and preserve the remainder for an unexpected bad shift. This prevents the common mistake of spending every available coin simply because an item is available.
The Save the Krusty Krab upgrade checklist can help you compare offers and spot expensive distractions. Use the night shop as a spending checkpoint rather than a place where every cash balance must be converted into inventory.
Five Questions Before Buying a Tool
Before buying the Save the Krusty Krab revive item, ask five questions to determine whether it solves a recurring failure and fits your current upgrade path: identify the exact mistake, confirm it was avoidable, calculate the shift-level cost, check whether the relevant villains appear now, and ensure the purchase will not crowd out a stronger economic upgrade.
-
What failed? Name the exact action, such as burning, dropping, mixing, or losing a customer.
-
Was it avoidable? If a missing prep tool or overcrowded station caused the error, buy the better tool instead.
-
How much did the mistake cost? Estimate the shift value lost, not merely the value of one ingredient.
-
Is the recovery relevant now? Damage-control purchases are less useful when villains do not appear in the current day range.
-
Will this purchase leave room for a better upgrade? A perfect tactical purchase can still weaken your long-term economy.
If the first three answers are uncertain, wait for a clearer shift before spending cash. If the loss reveals a recurring, expensive failure with a matching recovery tool—such as restoring burned or dropped ingredients, rescuing a lost customer, or correcting a mixed order—the purchase becomes easier to justify. Compare the revive item’s upgrade cost with the total shift-value loss, then confirm that the relevant villains and failure types appear in the current day range; otherwise, save your cash for a stronger economic upgrade.
When Cash Is Tight
A tight budget favors permanent improvements with broad application. Follow the Survivability First approach: buy capacity when orders stack, speed when travel dominates, and workflow tools when the same action causes mistakes. Keep only a small cash cushion until you can establish a stable service loop.
Avoid spending the entire balance on a revival item because the shift looked dangerous once. A single difficult day can make every purchase seem essential, but the next day may rotate both the offers and the type of pressure you face.
When to Buy Upgrades
Timing matters because cash accumulates during the day, while upgrade options appear between shifts. Buy when you can identify the bottleneck, have enough money to cover the purchase without abandoning essential savings, and understand whether the improvement will affect the next service day. Panic buying at the end of a rough shift usually costs more than planning purchases around recurring evidence.
| Timing | Purchase quality | Best decision |
|---|---|---|
| Immediately after a costly mistake | Reactive | Buy only if the same failure may return soon |
| After identifying a repeated bottleneck | High | Purchase the matching permanent fix |
| After a strong, profitable shift | High | Use surplus cash for a core upgrade |
| When cash is nearly depleted | Low | Preserve the remainder and wait |
| When the offer directly prevents a major failure | Potentially high | Buy if the impact exceeds its price |
Buy After Failure, Not After Frustration
A mistake is evidence; frustration is not. If you lost because the floor was crowded with orders, a capacity upgrade is better justified than a generic revival purchase. If a villain-related event caused the loss and the revive option counters that event, recovery may be the correct immediate solution. This distinction is especially important when comparing the Save the Krusty Krab best items to buy.
The supplied field notes recommend skipping damage-control tools until villains actually appear in your day range. Applying that rule prevents you from preparing for a threat that is absent from the current shift, which preserves cash for tools that affect every day.
Use a Two-Shift Pattern
A strong cash spending method is to separate buying into routine and tactical phases. During a routine shift, focus on the recurring bottleneck and make one permanent improvement. During a tactical shift, assess whether a revive item would protect unusually valuable progress. This two-shift pattern reduces the chance that panic from one day redirects your entire build.
When progressing, the Save the Krusty Krab late-game upgrade guide becomes more relevant as new shop options and tougher service conditions appear. The same bottleneck-first method still applies: recovery becomes worth more when each completed service carries a greater loss, but permanent efficiency remains valuable at every stage.
Read the Shop Before Choosing
Do not enter the night shop with only one item in mind. Read every available offer, compare the price against your planned upgrade, and check whether the offer solves a problem you actually encounter. Rotation means the desired item may return later, but that cannot be guaranteed. The community notes explicitly state that no single item is assured to appear on a given night.
That uncertainty is not permission to panic-buy. Instead, choose among the current offers according to Immediate Relevance: if an upgrade reduces a recurring bottleneck, such as slowing the Krusty Krab’s workflow during peak orders, its long-term payback can outweigh a one-night discount; a Save the Krusty Krab revive item, however, should be judged by whether it prevents a specific, expensive failure during a critical shift. Compare each offer’s cash cost with the upgrade tier you need, then buy only when the current rotation solves a present problem rather than saving every purchase for a hypothetical better night.
-
Permanent and recurring: capacity, speed, or better workflow tools.
-
Conditional and situational: damage control for shifts where villains appear.
-
Emergency and targeted: a revive item for a costly, identifiable failure.
-
Luxury and optional: convenience purchases with no clear bottleneck connection.
Best Items to Buy Priority Plan
Use a Bottleneck First plan rather than a fixed shopping list. Record the most common lost service, identify its cause, and match the purchase to that cause. This approach makes your decisions consistent across changing stock and gives each cash purchase a measurable purpose.
| Observation after a shift | Purchase category | Priority |
|---|---|---|
| Several completed orders remain uncollected | Capacity | Highest |
| Most time is spent crossing the kitchen | Speed | Highest |
| The same preparation error repeats | Workflow or prep upgrade | High |
| A single mistake destroys most progress | Revive item | High when active |
| Villain pressure causes the loss | Damage control | Conditional |
| No clear problem appears | Save cash | Conservative |
Build a Core Purchase Before Insurance
A dependable core usually includes one capacity or speed upgrade, one tool that makes preparation more reliable, and enough cash for a recovery purchase. The mix changes with your class and restaurant layout, but the principle remains: the core handles recurring work, while the revive item handles exceptional mistakes.
The Save the Krusty Krab furniture upgrades guide can help you see how station placement and restaurant capacity affect the same decisions. A better layout may reduce travel or prevent congestion, making an expensive equipment purchase unnecessary.
Protect the Shift You Are Already Winning
A revive item is most valuable late in a good run, when one mistake could erase hours of efficient service. It is less valuable at the beginning, when the shift still has room to recover naturally. This creates a simple timing rule: save the purchase for the point where failure becomes disproportionately expensive.
Watch for order density, dwindling time, or a costly stage, since these signals make a failed shift harder to recover and raise the cost of restarting from zero. If the run is stable, prioritize a permanent improvement instead. For example, when cash is already sufficient and customer orders remain manageable, an upgrade to serving capacity can prevent the bottleneck that would otherwise force a revive-item purchase. If the run is valuable but exposed, recovery is the rational insurance purchase: use the revive item to preserve the current cash and upgrade progress rather than spending scarce funds on another temporary boost.
Avoid Double-Dipping on Protection
Do not buy several tools for the same failure unless the mechanics truly stack. If speed already solves the walking problem, adding another movement option may produce little practical gain. Likewise, if a prep tool removes the error that previously required revival, a second recovery purchase can be less efficient than capacity or a better station arrangement.
Evaluate the change in your Failure Probability, not the number of items in your inventory. For example, if a single revive item prevents a repeat attempt at the same failing station, its practical value is higher than a second tool for a failure you can already avoid. A smaller loadout with clear roles is easier to manage, leaves more cash for capacity or station upgrades, and usually makes better use of limited funds.
Cash Spending Guide for Long-Term Progress
A sustainable cash plan protects both the current run and future opportunities. Reserve money before shopping, avoid treating every rotation as a deadline, and measure purchases against the problems you repeatedly encounter. The goal is not to buy the most items; it is to keep enough earning power to reach the next upgrade tier.
| Spending stage | Main objective | Reserve for later |
|---|---|---|
| Early progression | Fix the first obvious bottleneck | A practical emergency cushion |
| Stable service loop | Improve travel, capacity, or workflow | Bulkier cash reserve |
| Difficult shifts | Add targeted recovery when needed | A second permanent upgrade |
| Late progression | Strengthen the most valuable service loop | Future rotation opportunities |
Keep an Upgrade Reserve
Even if the current offer is excellent, retaining some cash protects against a future difficult day. Since the shop stocks rotate, another useful purchase may appear later, although this is not guaranteed. A reserve also gives you flexibility when a new bottleneck replaces an old one.
A good reserve should be based on your recent earnings rather than an invented percentage. Review how much cash you ended with after successful shifts and how much you needed to recover from an unsuccessful one. Use those observations to set a Cash Floor you try not to cross.
Separate Cash From Doubloons
The night shop is funded by cash earned during the day, not doubloons, according to the supplied community information. Keep that distinction clear when planning. Currency intended for progression or other systems should not be assumed to fund a night-shop purchase unless the interface explicitly allows it.
This also prevents misleading upgrade-cost comparisons in Save the Krusty Krab. Compare each cash price only with the cash earned during the current day shift, and keep doubloon-funded plans in a separate column because doubloons cannot replace cash at the night shop. For example, if a night-shop upgrade costs 10,000 cash but you have earned only 6,000 cash and 2,000 doubloons, it is not affordable yet. Likewise, an upgrade with a lower cash price may still be the better choice only when the required cash is available at the moment of purchase; doubloon savings do not improve your economy unless the game interface confirms that currency is accepted.
Make One Purchase Per Decision Cycle
After buying an upgrade, use it before making the next purchase. The immediate results will show whether it solved the intended problem. If travel remains slow after a speed upgrade, the bottleneck may actually be station placement, navigation, or another tool category. Testing one change at a time avoids wasting cash on redundant items.
For a broader look at building a balanced loadout, the Save the Krusty Krab all classes list can help identify which class strengths interact with your chosen upgrades. The best item for one character may differ from the best item for another, so character performance should influence your budget alongside shift evidence.
Upgrade Decision Checklist
Before leaving the night shop, complete this review: compare the revive item’s current shop price with the upgrade tier you can no longer afford if the run collapses. For example, if preparation speed remains adequate but a single customer surge repeatedly overwhelms your cash register and prep stations, a revive that restores your operating state may prevent a failed shift. If the item merely duplicates capacity, speed, or workflow upgrades you already own, keep that cash reserved for a missing bottleneck instead.
-
Bottleneck identified: You can name the failure that costs the most.
-
Cause understood: You know whether the issue involves capacity, speed, preparation, or villains.
-
Price verified: You are using the amount shown in the current shop.
-
Cash floor respected: The purchase does not consume your emergency reserve.
-
Permanent option considered: A recurring problem receives a recurring fix.
-
Recovery relevance established: The revive item addresses a realistic failure, not a hypothetical one.
-
Rotation accepted: You are not gambling your entire budget on another appearance.
| Final decision | Purchase |
|---|---|
| The item fixes a proven recurring bottleneck | Buy it |
| The item protects a valuable run from a likely failure | Buy it if the cash floor survives |
| The item only feels comforting after a bad shift | Wait |
| The item duplicates an upgrade you already own | Save cash |
| The price forces you to abandon a needed core upgrade | Decline |
The central lesson is simple: a revive item is most convincing when it solves a specific, expensive, and likely failure. Capacity, speed, and reliable workflow tools create the stronger foundation, while recovery protects that foundation during the moments when one mistake can threaten the entire run. Spending your shift cash on the item that matches the actual bottleneck is the most dependable way to build a resilient upgrade strategy.
Frequently Asked Questions
Should I buy the Save the Krusty Krab revive item first?
Usually, no. Buy it first only when a costly, recognizable failure can destroy an otherwise successful shift. Capacity, speed, or workflow tools are generally better first purchases when orders stack up, travel time dominates, or the same preparation mistake repeats. The revive item is strongest as targeted insurance after your core service loop is stable.
What are the Save the Krusty Krab best items to buy?
The best items depend on the bottleneck you can observe. Capacity is most useful when completed orders remain uncollected, speed helps when travel between stations consumes the shift, and workflow tools reduce repeated preparation errors. A revive item becomes the best choice when one mistake can erase substantial progress, but it should not replace a permanent fix for a recurring problem.
How much should I reserve for Save the Krusty Krab upgrade costs?
Reserve enough cash to buy the permanent improvement that fixes your recurring bottleneck while retaining a separate cushion for a difficult shift. The available community notes do not provide verified universal prices, so use the amounts shown in the shop and compare them with recent earnings. If a purchase leaves no emergency reserve, it may be a tactical choice rather than a sustainable upgrade.
Is the Save the Krusty Krab cash spending guide different for tough days?
Yes. On a tough day, prioritize a targeted recovery option when the same failure threatens a valuable run. On a normal day, favor permanent improvements and avoid panic purchases after a mistake. Community reports note that the shop opens between shifts, uses cash earned during the day, and rotates its stock, so preserving some money is sensible even when an offer looks attractive.
When should I make Save the Krusty Krab when to buy upgrades decisions?
Buy after you have enough evidence to identify the bottleneck and the cash to cover the relevant upgrade without abandoning your reserve. Read the current shop carefully because exact stock rotation rules are not officially documented. Purchase the offer with the clearest connection to a failure you experience, rather than assuming a particular item will return or reacting only to the emotional impact of one rough shift.